
As a makeup artist, wearer or lover, we all have messed up our makeup several times in our lives and most of the time it happens when we try to be creative with our outlook. We all share the same stories of makeup ruins; for example, when the cat eye makeup turned into the raccoon eye mess up. But among all the other steps of makeup, everyone at least for once thinks that why does my foundation always look bad? Like a building, all your makeup stands on the foundation. No matter how good you are at pulling off a winged eyeliner, if the base is not firm and tight, the rest of the makeup will fall off along with the foundation.
Just like another skill, we learn how to do perfect makeup with the perfect foundation, over time. But if the techniques you are using are incorrect, no matter how time and effort you put in, you will end up creating a disaster every time you aim to do makeup. There are some simple and basic rules to follow to always get your foundation right. I have learned some tips and tricks over the span of time, aiming to perfect my foundation. You will find them really helpful and you will feel the difference at your very first try.
Before applying anything on your face, wash off what is already layered up on it. Deeply cleanse your skin with facewash, milk cleanser or micellar water. It will help your skin breathe underneath the layer of makeup, clean up the dirt and unclog the pores; hence it will prevent your skin to get pimples or acne. It is a good practice to cleanse your skin before makeup and at the time of makeup removal.
Then comes the next most important step, scrubbing. With the gentle scrubbing you can scrub off dead cells from your face. It will help you get smooth skin where the layers of the foundation will set down evenly and perfectly without creating any bumps, acne breakouts and uneven skin surface.
If your skin feels like the Sahara after cleansing, do not jump on to the next step without perfectly moisturizing the skin. You might have seen love gurus pouring golden oils on their faces, tried to do the same and failed? Well that was not your fault. This step is not that simple as it seems to be. You need to know what kind of skin you have, dry, oily, normal or combination skin? what is the condition of your skin these days and how much moisturizer do you need to get the right amount of hydration of your skin.
Apply the oils that are non-greasy, get absorb quickly and do not risk the accentuation of pores. Remove the excess oils by bloating paper. Leave it for 30 to 45 minutes before the application of makeup, otherwise the foundation will break apart. Be more careful about excess oil on your face by the end of 45 minutes, if the foundation you are using is water based, wipe off the excess oil before moving onto the next step.
Using primer is very essential to keep your foundation intact for a longer period of time. It works as a quick complexion smoother. The purpose of the primer is to close the open pores and tighten up the skin. Open pores look really bad when they pop out of the layers of foundation. It gives you a hard time in applying the full coverage foundation. If you are aiming for glass skin, primer is a must.
Primer act as a barrier between the skin and the makeup. If you are having an oily skin then the primer will prevent the seepage of oil to the layer and if your skin is dry the it will prevent the foundation to soak in the skin, called ‘drinking’,
Apply primer on your skin, 5 minutes before the application of the foundation. If you do not have a primer, you can use alternative products instead, for example,
- Anti-Chafing cream
- Rubbing an ice cube
- Deodorant
- Aloe Vera gel mixed with a moisturizer
- Milk of Magnesia
- Lacto Calamine lotion
- Nivea aftershave balm
- Grease free sunscreen
These products will prime your skin and provide you a smooth, soft and leveled ground for the foundation.
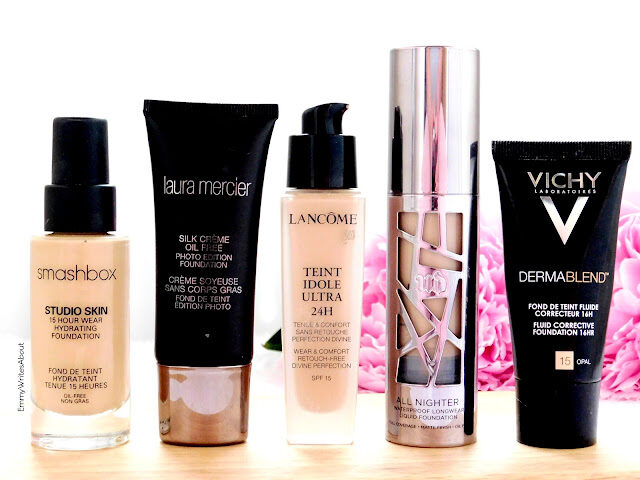
CHOOSE THE RIGHT FOUNDATION FOR YOUR SKIN
If you are having a wrong product then how can you expect good results? If you are having dry skin then apply the foundation along with moisturizer. If the skin is oily then apply the liquid foundation with powder foundation and setting powder.
Always buy 2 shades of foundation; one exactly matching to your skin tone and the other of a little lighter tone. The idea is, that your face is not of the same tone all over, the center tends to be lighter and the perimeter is darker than the center. So, it is better to two shades of foundation to get a natural look. As per experts, the foundation should be one or two shades lighter than the skin tone, because when you will apply the contour, it will mix perfectly and will give you a nice blend of colours.
Identify the exact tone of your skin. There is a tip to identify your original skin tone and undertone. Look at the veins at your wrist, if these look green to you, then you are having warm undertone. If your veins look blue then you are having cool undertones. Moreover, if your skin has olive undertone, consider it warm and if it is pink then it is of cool undertone.
Beige is the neutral colour and everyone can use it. However, match the foundation with the tone by directly applying it onto the skin, while for matching it with undertones, choose foundation with yellow to golden tinge, warm beige, for warm tones. And choose beige with pinkish tinge, called cool beige, for cool undertones.
After choosing the right foundation for your skin, get to know yourself, how to apply the foundation! The tools you need for application depend upon the coverage that you are aiming for.
- For Natural Coverage, use a beauty blender. Soak it in the water until it doubles in size then use the damp sponge to apply foundation.
- For Medium Natural coverage, use long bristle synthetic brush.
- For Medium Coverage, use the stippling brush.
- For Medium to nearly full coverage, use fingers.
- For Full coverage, use a flat surface Kabuki brush.
Using your own fingers to apply the foundation gives you the most natural skin finish. The warmth of your fingers helps in the even spread of the foundation all over the face. A brush is ideal for the concentrated placement of the foundation. A sponge allows the application f the foundation in a very natural, subtle way.
USE CONCEALER AT THE END.
To fix the pimples and the acne scars, that peaks through the layer of foundation, use a concealer. Apply concealer to the areas you want to keep bright. For example, between the brows, center of the forehead, down to the bridge of the nose, upper lips and chin area plus the area under your eyes to cover up the dark circles. This set will perfect the patches of flaw in your foundation that the foundation failed to cover up.
USE THE SETTING POWDER / SPRAY.
If your skin is oily hen apply setting powder after getting down with the makeup. And if our skin is ry the skip the setting powder, use setting spray instead; as powder will draw out all the moisture of your skin and will make it look patchy and cakey, you will end up getting puffy, dry and unnatural skin.
You can use a professionally made setting spray or you can make a DIY setting spray at home by mixing Aloe Vera gel in rose water. Put the mixture in a spray or mist bottle and spray it on the final makeup look to lock it at place from the distance of an arm’s length.
REMEMBER, LESS IS MORE
Once you are done with the makeup, do not go over and over again with the powder foundation or setting powder. Because too much product on your face will make it look dehydrated and cakey, far from natural. The foundation will start to get patchy and fall off quickly. If needed, blend, blend and blend the foundation with the help of the fingers or brush to get a smooth finish and flawless makeup base.
CONCLUSION
These are some of the easy tips you need to master to get a flawless foundation base daily. Practice will make you perfect. Hopefully, this article covered all the weak points one can possibly make to mess up her foundation. If you are still having any query regarding the foundation application, feel free to ask in the comment box down below.
Moreover, we have recently published an article Best Cream Blush For Mature Skin. So please don’t forget to check that out also.
1 thought on “WHY DOES MY FOUNDATION ALWAYS LOOK BAD?”
Comments are closed.