I don’t think there’s anything women tell me they cannot do more than apply false lashes. As someone who does it on clients at least twenty times a week, every week, I promise you you can do it – you just need to know what lashes to choose, how to apply them and how to fit them to your eye shape. Other than seasoned lash wearers, most women I talk to try once or twice, get in a complete muddle and then give up forever more. I put them on almost all my freelance clients for wedding, from Mums to brides, to day makeup, to evening makeups and they can look natural and appropriate for all occasions.

1. Go Fluffy
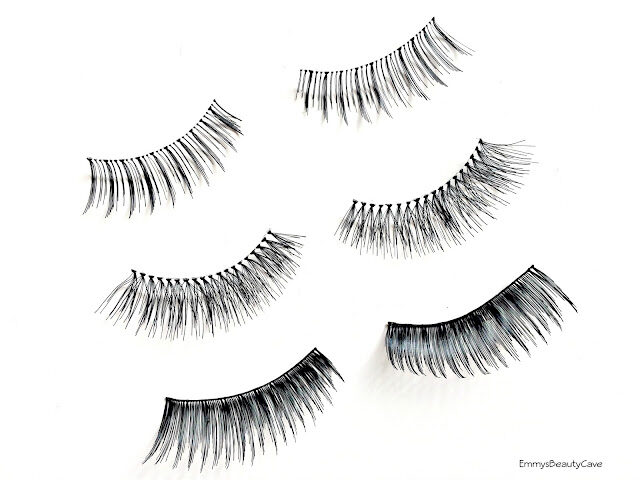
If you want hardcore, full TOWIE glam and you love big ol’ spiky lashes, be my guest – this is just not my personal taste, but there is nothing wrong with it! If you like soft and natural, ensure you pick fluffy, feathered, tapered lashes with that aren’t too dense. Not only will massive thick lashes be a b*tch to apply because they tend to sit on a much stiffer seam / band which won’t bend to the shape of your eye as easily, too thick, dark and long will often make your eyes look darker and smaller, and “close” them up, rather than opening them. They make look less inspiring in the pack (and I know the tendency is, ooh I never wear lashes, let’s go for it!) but I promise, if you don’t usually wear them, shorter and sparser will be more than enough. I tend to like lashes where the ends are longer to give length and uplift to the eyes, but if you prefer a rounder, less cat-eye shape, go for rounded (i.e. longest lash is in the middle not on the end).
My Faves – Ardell Demi Wispies, Kiss Ritzy, Kiss Blooming Lashes, Ardell 110, (pretty much anything with Wispie in the title is a good bet!) Individual Cluster/Flare Lashes (I usually use short, occasionally medium – never long), Trio clusters are super easy to apply on yourself too.
2. Go for volume over length
Generally, I match the length of the lashes to the client’s lashes as all I really want to do is add volume, not loads of length. Particularly if you have small or hooded eyes, I find really long lashes just draw attention to that and make eyes look more closed whereas a teeny bit of length but plenty of density really opens the eyes up. I also like lashes to look like they aren’t false – really long ones never look super natural as noone’s lashes are up to their eyebrows!

3. Measure and trim!
Unless you have huge eyes (lucky you), it is unlikely strip lashes will fit you without trimming as they are pretty long (length ways). They shouldn’t be hanging over the edge of your natural lash – not only does this look clumsy but it also makes your eyes look sleepy and downturned instead of wide and awake. For strips I always lay the lash on first before glueing and see how much I want to remove to ensure it fits. Always trim the longest end (outer corner) – you don’t want to remove the graduation at the other end as that gives a natural taper like your own lashes. Depending on the type of lash, they do not have to sit exactly where the very first lash starts – if your lashes are teeny there there won’t be much hair to support them and for the glue to grab onto. I usually start where the lashes thicken up, although sometimes for a super easy natural look, I just cut to a half lash and use on the outer half of the eye only (good to do if you struggle – much easier!)
4. Go for human hair
I do usually work with human hair lashes – they are so much more comfortable and the hair is much finer than synthetic. I don’t mind Mink, but again I don’t find them as easy to apply as real hair plus they are expensive.
This is as much glue as you need!
5. Use a decent glue
I wouldn’t want to live in a world without Duo – I have clear but prefer black as it’s absolutely seamless, especially on individual flares. It always doesn’t dry instantly, so you can push the lash around if you need to to get it in the right place before it sets. This is latex based, but if you’re allergic there is a latex free. Pop a tiny bit on the back of your hand, wait until it’s slightly tacky, then using tweezers run the seam through the glue – you only need the tiniest bit. If you stick your eyes together it’s because you are applying far too much glue! Use tweezers to drop onto the lashes with your eyes open – just look down into the mirror as it will be easier to see the base of your lashes.

6. Apply lashes after makeup
This is a preference, and not everyone does this, but I’ve always applied lashes after all top lid makeup is on, including mascara. I find if I put mascara on after lashes it tends to look clumpy and heavy, but some people put on before and after to ‘blend’ lashes with your own lashes. Regardless, don’t put them on first before eyeshadow etc, as you’ll end up with loads of fall out and makeup sitting on the eyelashes (pet peeve!).
7. Stick to the lashes, not the skin
A simple one, but what a revelation! This will make them feel much more comfortable, look more natural and avoids a gap between your lashes and false lashes.

I know that sounds like a lot, but honestly – this corrects most mistakes people make which make them difficult, uncomfortable, likely to fall off or too heavy looking. This photo is a full set of individual short flares on one of my friends (props to awesome for this shot!) – they look gorgeous and as you can see super natural, so well worth it when you get it right!
Emily xx